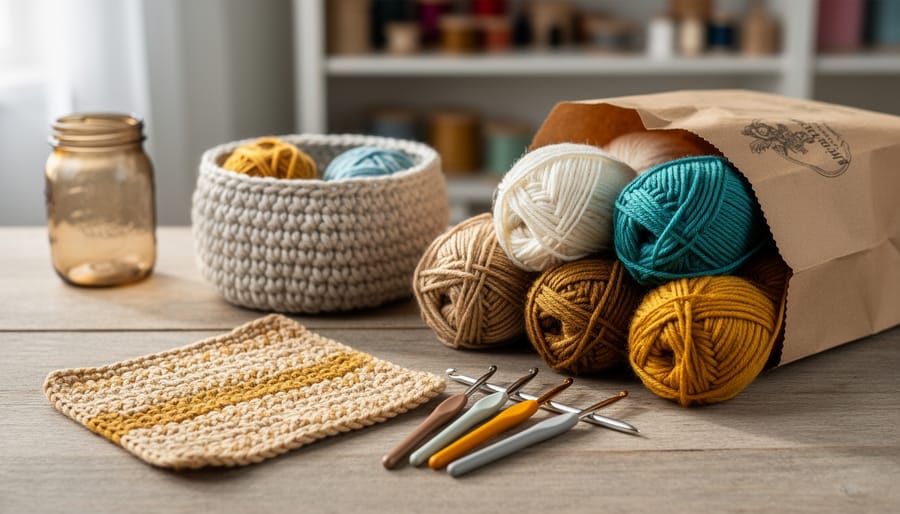
You can crochet beautiful, functional projects using thrifted clearance yarn for just a few dollars per item, often with free patterns that take only a couple of hours to complete. These beginner-friendly makes require minimal supplies and no expensive specialty materials, which means you can build your crochet confidence and your handmade collection without the upfront investment that stops so many crafters before they even start. The secret is pairing clearance finds with simple patterns designed for quick satisfaction.
Thrift stores, estate sales, and craft shop clearance bins overflow with yarn that someone else bought for planned projects but never finished. That orphaned skein is your opportunity. Instead of spending hours searching for the perfect new yarn and watching your budget evaporate, you can work with what’s already there, letting the yarn itself guide your project choices. A single ball of worsted weight becomes a cozy washcloth. That chunky skein you found for two dollars transforms into a textured basket for your bookshelf.
This approach flips the usual craft planning process. Rather than picking a pattern and then hunting down specific materials, you start with what you’ve thrifted and match it to patterns that celebrate those exact qualities. The accessories, home decor pieces, wearables, and charming amigurumi you’ll discover in this guide work beautifully with mixed weights and mystery fiber blends, giving you permission to experiment without worry. You’ll learn exactly which projects suit each yarn weight, how to prepare your workspace safely, and how to verify your finished piece meets the pattern specs.
What You’ll Need to Get Started
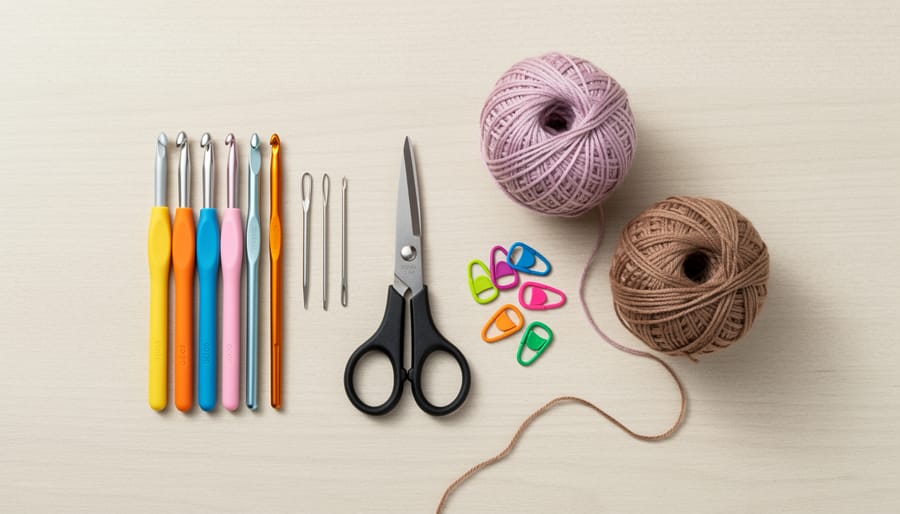
The beauty of crochet lies in its simplicity, you don’t need expensive equipment or a craft room full of supplies to start creating. For these thrifted-yarn projects, your entire toolkit can fit in a small bag and cost less than the yarn itself.
Your core supplies include:
- Crochet hooks in sizes E/3.5mm through K/6.5mm to accommodate different yarn weights
- Sharp scissors for clean cuts
- Yarn needle with a large eye for weaving in ends
- Stitch markers to track your place in patterns
- Measuring tape for checking gauge and sizing (optional but helpful)
I’ve picked up perfectly good metal hooks at estate sales for fifty cents each, and thrift stores often have entire sets tucked in with sewing notions. Don’t stress about buying a complete range right away, start with one medium hook around H/5mm, which works beautifully with worsted weight yarn.
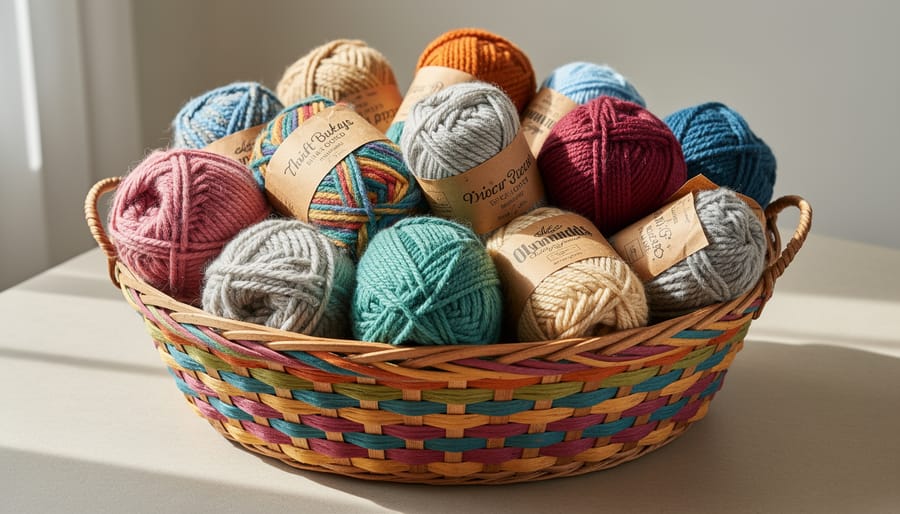
Speaking of yarn, clearance bins are your best friend. You’ll find lace, DK, worsted, and chunky weights marked down at craft stores, especially after seasonal color changes. Thrift stores carry donated yarn from crafters who overestimated projects or cleared out stashes. Estate sales sometimes yield entire boxes of vintage yarn that’s perfect for one-ball accessories and smaller makes.
When you’re assessing thrifted yarn quality, give each skein a gentle squeeze, it should feel springy, not brittle or crumbly. Unwind a few inches and check for weak spots, breaks, or moth damage (tiny holes are a red flag). Smell matters too; musty odors mean the yarn sat in damp storage and might harbor mildew. Pull gently on a strand, if it snaps easily, pass on it. Slightly faded colors are fine for many projects, and you can always combine different shades into multi-color designs. The label tells you fiber content and weight, but if it’s missing, match the yarn thickness to a hook size chart at the store or compare it to yarn you already own.
Before You Begin: Quick Tips for Success
Getting your workspace and materials ready takes just a few minutes but makes a real difference in how much you enjoy the process. Before diving into your first thrifted-yarn project, walk through these quick checks to set yourself up for a smooth, comfortable crafting session.
Start by giving your thrifted yarn a proper inspection. Hold it up to good light and look for weak spots, thin areas, or small holes that might indicate moth damage. Gently tug a strand, it should feel strong and springy, not brittle or ready to snap. If you spot any questionable sections, you can often cut them out and rejoin the yarn, or simply skip that ball and use it for stuffing instead.
Set up your crochet spot near a window or under a good lamp. Squinting at stitches in dim light for an hour will leave your eyes tired and give you a headache you don’t need. Natural daylight works beautifully, but a bright LED desk lamp does the job on cloudy days or evening crafting sessions.
Pay attention to how you hold your hook and position your hands. Keep your wrists fairly straight rather than sharply bent, and take a break every twenty minutes or so to shake out your hands and stretch your fingers. Repetitive strain sneaks up quietly, but these small adjustments keep crochet fun rather than painful.
How to Choose the Right Project for Your Yarn
The yarn you scored at the thrift store won’t work for every pattern, and that’s perfectly fine. Matching what you have to the right project saves frustration and sets you up for a finished piece you’ll actually love.
Start by identifying what you’re working with. Hold your yarn next to a light source and look at the thickness. Lace and DK weights feel delicate between your fingers, worsted is the classic medium weight most patterns call for, and chunky yarn is obviously thick and squishy. If the label is missing, wrap the yarn around a ruler twenty times and measure the width, worsted typically spans about two inches, while chunky takes up three or more.
Next, figure out roughly how much you have. Wind the yarn into a loose ball and weigh it on a kitchen scale if you have one, or estimate yardage by wrapping it around your arm from fingertip to opposite shoulder. Each wrap equals roughly one yard. A single 50-gram ball of worsted usually gives you 90 to 110 yards, enough for small accessories or one amigurumi piece. Two balls open up wearables like scarves or headbands.
Here’s a simple framework to match yarn to project:
- Identify your yarn weight by comparing thickness to standard descriptions or checking any remaining label information.
- Measure approximate yardage using a scale, arm-wrapping method, or by counting how many times the strand circles a yardstick.
- Choose a project category based on what you have, quick-to-make accessories need the least yarn, then amigurumi and home decor, with wearables requiring the most.
- Find a free pattern that matches your weight and yardage, focusing on one-ball ideas or small-project designs when you’re working with limited amounts.
Quick-to-make accessories like washcloths, coasters, and bookmarks work beautifully with partial balls or mystery yardage because they’re forgiving. Beautiful home decor pieces such as plant hangers or small baskets let you mix weights and colors if you’re short on a single type. Wearable pieces demand more consistency in weight and color, so save those for when you find multiple balls of the same yarn. Charming amigurumi projects are ideal middle ground, they need modest yardage but benefit from uniform texture.
15 Easy Projects You Can Make with Thrifted Yarn
Quick-to-Make Accessories
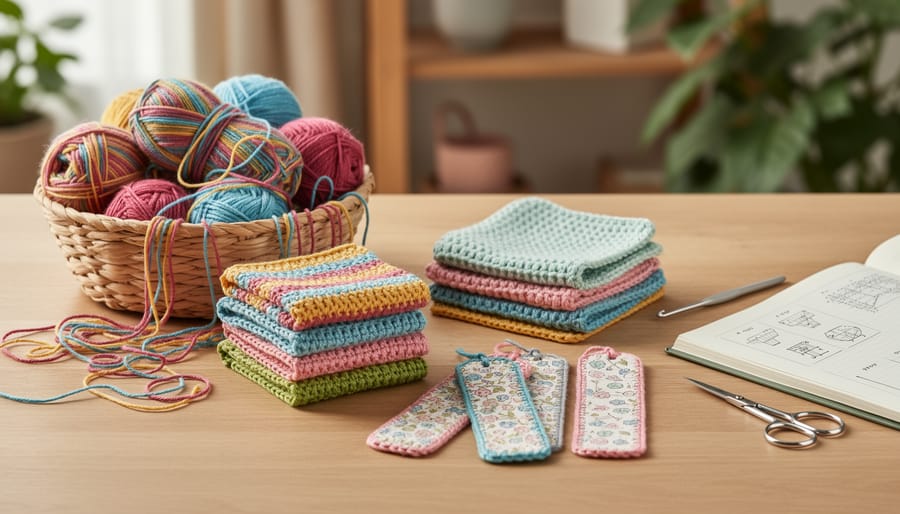
Small accessories make perfect starter projects when you’re working with thrifted yarn because they come together in an hour or two and let you test different stitches without committing to a large piece. A simple washcloth in single or double crochet uses about 50 yards of worsted weight yarn, so one clearance ball will often make two or three. They’re forgiving practice grounds for tension and give you something useful at the end.
Coasters work beautifully with cotton or acrylic scraps you find in thrift store bags. A basic round coaster takes 20 minutes once you’ve got the rhythm down, and you can experiment with granny squares, spirals, or textured stitches like the moss stitch. Make a mismatched set from different clearance colors for a vintage vibe, or stick to two tones for a cleaner look.
Bookmarks turn leftover yarn into thoughtful gifts. Check out bookmark patterns that use just a few yards and work up in under half an hour. Try a simple chain with decorative edges, add tassels from scrap yarn, or incorporate beads you’ve picked up at estate sales. These tiny projects let you try new color combinations risk-free since you’re only investing minutes of your time.
The real advantage here is speed. Finish one while watching a movie, then immediately start another with different yarn or a new stitch pattern you’ve been wanting to learn.
Beautiful Home Decor Projects
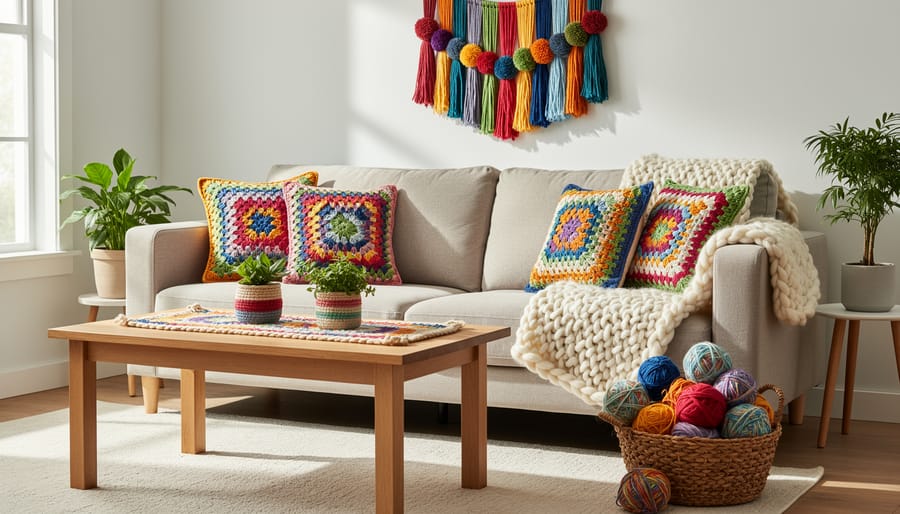
Home decor projects let you turn clearance yarn into pieces that genuinely elevate your space without looking handmade-cheap. A simple plant hanger works up in an afternoon using chunky weight yarn, macramé-style knots create the structure while basic chains form the hanging loops. Pair it with your thrift store decor finds like ceramic pots for a cohesive vintage look.
Small baskets shine when you mix different clearance colors. A DK weight base in cream with worsted weight handles in sage green creates that collected-over-time aesthetic designers charge hundreds to achieve. Use single crochet in continuous rounds for sturdy sides that actually hold keys, remotes, or yarn scraps.
Table runners and pillow covers eat more yardage but often you can piece together two or three clearance balls in complementary shades. Granny squares work beautifully here because intentional color blocking looks deliberate rather than scrappy. A 12-by-48-inch runner takes roughly 400 yards of worsted weight, exactly what three clearance skeins typically provide.
Wall hangings need minimal yarn. Create texture with varied stitches like popcorn, bobble, or loop stitches in a small rectangular panel, then mount it on a thrifted wooden dowel. Fringe made from leftover ends adds movement and uses up those last bits you’d otherwise toss.
Wearable Pieces for Everyday Style
Wearable pieces transform thrifted yarn into accessories you’ll reach for daily. Scarves are perfect starter projects that work beautifully with a single ball of chunky or worsted weight yarn, a simple infinity scarf requires minimal stitching and creates a cozy loop you can wrap twice. Headbands take even less yarn, often completing in under an hour, and they’re forgiving if your tension varies since the stretchy nature of crochet adjusts to most head sizes.
Fingerless gloves are surprisingly quick when you work them flat and seam the sides, leaving an opening for your thumb. They’re ideal for using up leftover clearance yarn in DK or worsted weights, and you can customize the length to cover just your palm or extend up your forearm. Simple shawls built from basic triangular shapes let you mix different thrifted yarn colors as you work outward, check out easy shawl patterns that guide you through increasing rows without complicated stitch combinations.
Ear warmers work up fast with chunky yarn and need only enough to wrap around your head once, making them perfect for those single balls you find in clearance bins. When sizing wearables, measure loosely since crochet fabric has natural stretch. If a project feels slightly snug as you work, block it gently with steam after completion to open up the stitches and adjust the fit to your preference.
Charming Amigurumi and Small Toys
Amigurumi might sound fancy, but these small stuffed creations are perfect for beginners working with thrifted yarn. You’ll use minimal yardage per project, which means that single ball of clearance worsted weight or chunky yarn can become two or three little toys.
Start with basic shapes before tackling full animals. A crocheted ball takes about an hour and teaches you how to increase and decrease in rounds, the foundation of all amigurumi. Cubes work up quickly in any weight yarn and make great rattles or baby blocks when stuffed firmly. Simple cylinders become caterpillars, snakes, or rolled-up hedgehogs with minimal embellishment.
Once you’re comfortable with shaping, try beginner-friendly animals with minimal parts. Think of creatures that are mostly one piece: octopuses, jellyfish, or basic teddy bears where the head and body form a single unit. Clearance DK and worsted weights work especially well since they create toys that aren’t too small or too large.
Stuff your projects with polyester fiberfill rather than batting, which can lump. If you’re making toys for children under three, skip button eyes entirely and embroider faces with yarn instead. Buttons present choking hazards, and safety eyes need to be installed before you finish stuffing. For older kids or decorative pieces, plastic safety eyes from the craft store work fine and cost just a few dollars.
The beauty of amigurumi is that imperfections add character. That slightly wonky bunny made from thrifted yarn becomes more charming because it’s one of a kind.
Your Step-by-Step Process
Here’s a system I’ve used dozens of times since that first washcloth I made from a dusty ball of cotton blend I found for 75 cents at a church rummage sale. The project took me three evenings, and I was hooked. Breaking the process into clear steps keeps you moving forward even when life gets busy.
- Choose your project category based on the yarn you have. Quick accessories work for scraps under 50 yards, home decor and wearables need 100-300 yards, and simple amigurumi typically require one full ball.
- Gather your thrifted materials and assess what you have. Check the yarn weight label if it still has one, or compare the strand thickness to online charts. Pull out about 20 yards and inspect for weak spots or pilling.
- Find a free pattern that matches your yarn weight and yardage. Search for terms like “one-ball scarf worsted” or “scrap yarn coaster pattern” to get targeted results that won’t leave you short.
- Make a small gauge swatch if the pattern specifies one, especially for wearables. This four-inch test square takes ten minutes but prevents sizing disasters later.
- Work through the pattern at your own pace. Set a timer for 20-minute sessions if you’re squeezing crafting into a hectic schedule. Mark your place in written patterns with a sticky note.
- Finish by weaving in loose ends with your yarn needle, then block the piece if needed. Soak natural fibers in cool water for 15 minutes, pin to shape on a towel, and let dry overnight.
When you make a mistake, and you will, resist the urge to abandon the whole thing. Most errors show up within a few rows. Unravel back to the problem spot, put the working loop back on your hook, and continue. I’ve ripped out the same scarf edge three times before getting the tension right, and that piece became my favorite winter accessory. The beauty of clearance yarn is the low-stakes practice. You’re learning without the pressure of expensive materials, and every finished piece builds your confidence for the next one.
Where to Find Free Patterns and Resources
Finding free crochet patterns that work with your thrifted yarn stash is easier than you might think. Online pattern databases offer thousands of beginner-friendly designs you can browse by project type, yarn weight, and skill level. Look for one-ball patterns and small accessory designs that specifically call for minimal yardage, since these adapt perfectly to clearance finds.
Your local library is a goldmine of crochet resources. Many libraries carry craft book collections with classic patterns, and you can check them out without spending a cent. Some even host craft groups where members swap patterns and project ideas.
Thrift stores themselves often stock vintage crochet books and pattern pamphlets for under a dollar. These older resources frequently feature timeless designs that use straightforward stitches and minimal supplies, exactly what works best with thrifted materials.
The real skill is learning to adapt patterns to your yarn rather than shopping for specific supplies. If a pattern calls for worsted weight but you have DK, simply size up your hook and adjust your expectations for the finished dimensions. When you find chunky yarn on clearance, look for patterns tagged as quick makes, since they work up fast with heavier weights.
Join online crochet communities where crafters regularly share their favorite free resources and discuss yarn substitutions. These spaces offer real-time advice on matching your thrifted finds to suitable projects.
How to Tell When Your Project Is Complete
Your project is ready when you’ve completed all pattern rows, secured your yarn properly, and can’t spot any obvious gaps or mistakes. Start by cutting your working yarn, leaving a six-inch tail, then pull it through the final loop to lock the last stitch in place.
Weaving in ends comes next. Thread each yarn tail through your needle and work it back through several stitches on the wrong side of your piece, changing direction once to prevent it from pulling loose. Give each woven end a gentle tug, if it holds firm, trim the excess close to the fabric. For thrifted yarn that might be slightly worn, weave through extra stitches for security.
Check your finished piece against the pattern photo or description. Does it match the intended size and shape? For accessories like bookmarks or coasters, minor size differences won’t affect function. Wearables need accurate measurements, if a headband feels too tight, it needs adjustment before you call it done.
Run your hands over the surface looking for pulled stitches, loose spots, or yarn that’s split during work. Small imperfections add handmade character, but structural issues like dropped stitches or holes need fixing. If everything feels sturdy, the edges lie flat, and you’re happy with how it looks, your thrifted-yarn creation is complete and ready to use or wrap up as a gift.
What to Make Next
Once you’ve completed a few projects, your growing pile of leftover yarn scraps becomes the perfect playground for skill-building. Grab those odds and ends from different clearance finds and try a granny square sampler blanket, each square uses a different color combination, so you’ll practice joining techniques while creating something uniquely yours. Striped scarves work beautifully with thin strips of contrasting yarns, and patchwork coasters let you experiment with new stitch patterns on a small scale without commitment.
Keep a portable project bag stocked with a simple work-in-progress, extra hooks, and a few yarn scraps. Tuck it in your car or by the couch for stolen moments of crafting. I keep mine loaded with an ongoing scrap afghan that grows whenever I have fifteen minutes to spare.
Join online crochet communities on social media or forum groups where makers share their thrifted yarn transformations. You’ll find fresh inspiration, troubleshooting help, and proof that there’s no single “right” way to crochet. These spaces celebrate happy accidents and encourage you to trust your instincts. Mix worsted and chunky weights in one piece, combine clashing colors that somehow work, or invent your own stitch combinations. Your personal style emerges through experimentation, not perfection.
Common Questions About Thrifted Yarn Crochet Projects
Can you really make quality items with thrifted yarn?
Absolutely. Thrifted and clearance yarn can produce beautiful, durable projects when you choose intact skeins and match the right yarn to your project. Many crafters prefer the unique colors and discontinued brands found at thrift stores.
How do I know if clearance yarn is good quality?
Check for even twist throughout the strand, sniff for musty odors that indicate poor storage, and run your fingers along the yarn to feel for thin or broken spots. Gently tug a strand; it should have some give without snapping easily.
Do I need to know advanced stitches for these projects?
Not at all. The quick-to-make accessories, beautiful home decor pieces, and wearable items can all be made with basic single crochet, double crochet, and chain stitches that beginners learn first.
How long do these projects typically take?
Small accessories like washcloths, coasters, and bookmarks can be completed in one to three hours. Larger items like scarves or simple shawls might take a weekend, while charming amigurumi projects vary from two hours for tiny shapes to a full day for more detailed animals.
Where can I find patterns for one ball of yarn?
Free patterns are widely available online, including crochet patterns specifically designed as one-ball ideas. Many pattern sites let you filter by yardage, and library craft sections often have books dedicated to scrap and single-skein projects.
Can beginners make amigurumi?
Yes, start with simple geometric shapes like balls or cubes before attempting detailed animals. Basic amigurumi uses repetitive rounds of single crochet worked in a spiral, which becomes meditative once you get the rhythm.
Is it safe to use secondhand yarn?
It’s safe after proper inspection and washing. Soak thrifted yarn in gentle detergent, rinse thoroughly, and let it dry completely before use. This removes dust, potential allergens, and any musty smell while refreshing the fibers.
Working with clearance yarn available in lace, DK, worsted, and chunky weights gives you flexibility across all fifteen project types. Since these materials are for planned projects and smaller makes while stocks last, grab appealing skeins when you spot them rather than waiting for the perfect match. You can always adapt a pattern to suit the yarn you have on hand, swapping a worsted-weight scarf pattern for chunky yarn to create a faster, chunkier version, or using lace weight for delicate bookmarks instead of the suggested thread.
The beauty of starting with small projects is that mistakes cost you an hour or two, not weeks of work. If a coaster turns out wonky or your first amigurumi ball looks more oval than round, you’ve still practiced essential skills and used minimal materials. That’s the advantage of choosing quick-to-make accessories and small home decor pieces as your entry point into crochet with thrifted supplies.
You’ve got everything you need to start crocheting beautiful, budget-friendly projects today. Whether you pick up a single ball of clearance worsted weight yarn for a cozy washcloth or score a bag of mixed DK yarn scraps for colorful coasters, you’ll be amazed at what you can create for under $10. These 15 project ideas prove that sustainable crafting doesn’t mean sacrificing style or fun.
Start small if you’re feeling nervous. A simple bookmark or pair of coasters takes just an evening, and you’ll build confidence with every stitch. The beauty of working with thrifted materials is that there’s no pressure for perfection, each piece carries its own story and character.
I’d love to see what you make. Grab that bag of clearance yarn you’ve been eyeing, choose one project from the list, and give yourself permission to experiment. The planet benefits, your wallet benefits, and you get to enjoy the meditative rhythm of crochet. That’s the heart of thrifty, creative living: turning simple materials into something uniquely yours, one stitch at a time.