

Clearing a family home after a health crisis is a phased process that typically takes 4 to 8 weeks, combining practical sorting, thoughtful donation, and compassionate decision-making about decades of belongings. The most successful approach breaks the work into room-by-room sessions, recruits a small team of trusted helpers, and creates a clear three-tier system for items: keep, donate or sell, and discard. This framework keeps you moving forward even when emotions run high, and it transforms an overwhelming task into something manageable.
If you’re reading this, you’re probably facing one of life’s hardest transitions. Maybe a parent is moving to assisted living and their three-bedroom home needs to be emptied in six weeks. Maybe a sudden diagnosis has shifted your family’s living arrangements overnight. Maybe you’re managing an estate and the sheer volume of stuff feels paralyzing. Whatever brought you here, you’re not alone, and you don’t need to have all the answers today.
The good news is that a values-driven approach makes the process lighter. By prioritizing donation, resale, and thoughtful repurposing, you give cherished items new life instead of sending everything to a landfill. That shift in perspective turns clearing out into an act of generosity, not just grief. You’ll find homes for furniture, clothes, books, and kitchen goods while honoring the person who built this life. The practical steps matter, but so does the story you’re telling yourself about the work.
For families navigating property decisions alongside health changes, resources like propertysaviour.co.uk can provide additional guidance on the bigger financial picture. In the sections ahead, we’ll walk through tools, safety considerations, and a step-by-step roadmap that respects both your timeline and your heart.
What You’ll Need: Supplies, Help, and Headspace

Before you step inside and start sorting, take a breath and gather your supplies. You’ll need practical tools, human help, and a plan for your emotional energy, all three matter as much as each other.
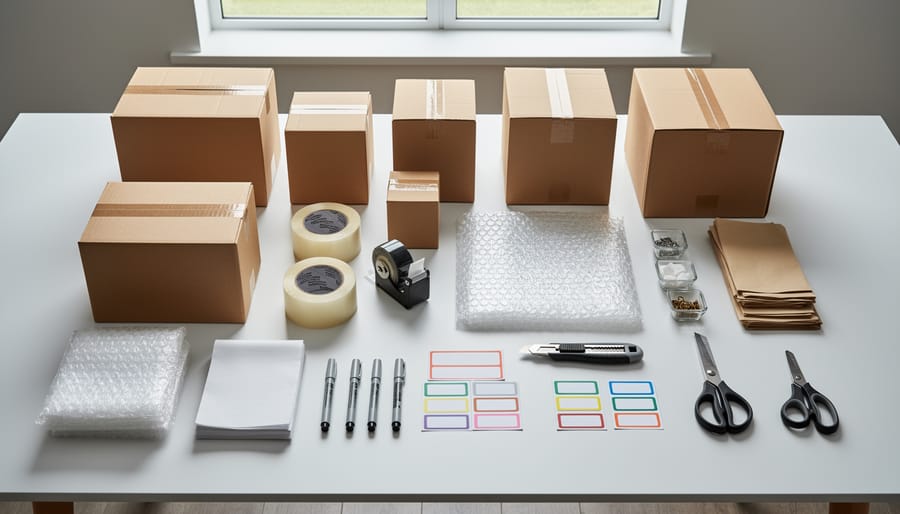
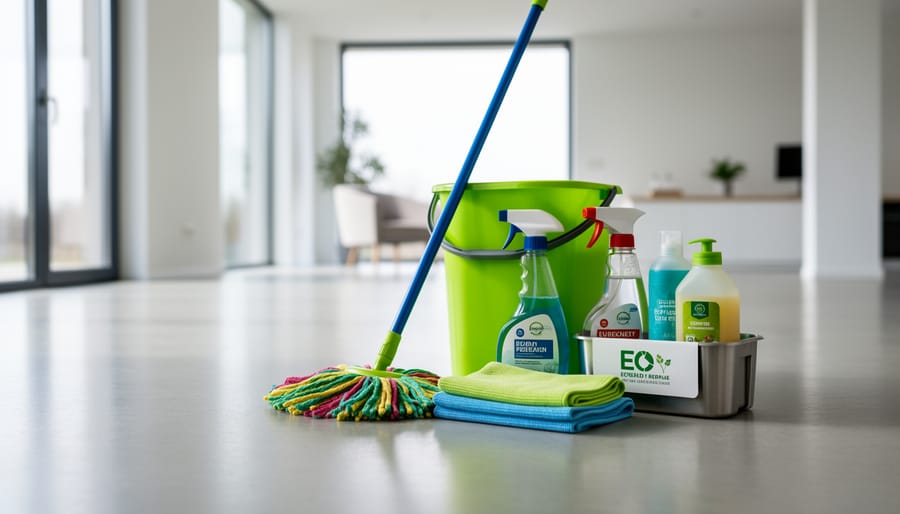
Start with the basics: sturdy cardboard boxes or plastic bins, packing tape, permanent markers in multiple colors (one per sorting category), sticky notes for quick labeling, and garbage bags in several sizes. A dolly or hand truck saves your back when moving furniture or stacks of boxes. Don’t forget cleaning supplies, dust masks, gloves, all-purpose cleaner, microfiber cloths, and a broom. Old homes hold decades of dust, and you’ll want protection and tools to wipe surfaces as you go.
On the logistical side, do some homework before you start. Research local donation centers and their pickup policies, compare junk removal services (get at least two quotes), and ask friends or neighbors for estate sale company recommendations. If the home has valuable vintage pieces or collectibles, line up a consignment shop or online resale platform contact. Having these resources in your back pocket means you won’t stall mid-project wondering where to send a beautiful mid-century dresser or three boxes of gently used kitchenware.
Here’s a quick checklist to assemble before day one:
- Sturdy boxes, bins, tape, markers, labels, and garbage bags
- Dolly or hand truck for heavy lifting
- Cleaning supplies: gloves, masks, disinfectant, cloths, broom
- Contact info for donation centers, estate sale companies, junk removal services
- At least one trusted friend, family member, or hired organizer to help
- Snacks, water, and a playlist or podcast for long sorting sessions
Finally, recruit your team. Clearing a family home solo is possible but brutal. Invite a friend who’s good at decision-making, a sibling who knows the family history, or hire a professional organizer if the task feels too big. Emotional support isn’t a luxury, it’s part of the toolkit. Someone to hand you tissues, remind you to take breaks, and celebrate small wins makes the whole process survivable.
Important Considerations Before You Start
Before you start sorting and packing, pause to address the less obvious but critical aspects of this project, safety risks, legal obligations, and your own capacity. Skipping these considerations can derail the entire process or put you in harm’s way.
First, scan for hazardous materials. Old homes often hide surprises: expired medications, cleaning chemicals, paint thinners, pesticides, batteries, and even asbestos insulation or lead paint in older properties. Don’t mix or dump these items with regular trash. Contact your local waste management facility to learn how to dispose of hazardous waste safely, or schedule a pickup through a certified service. If you spot mold, suspect structural damage, or encounter strong chemical odors, stop clearing that area and call in a specialist.
Next, tackle the legal and financial groundwork. Review the will or estate documents to understand who has authority to make decisions and whether specific items are designated for particular family members. Coordinate with siblings or relatives early to avoid conflicts over sentimental pieces or valuable belongings. If the estate is complex, probate is involved, or there’s any uncertainty about asset distribution, consult an estate attorney before you donate or sell anything significant. Getting this wrong can create legal headaches later.
Set a realistic timeline that accounts for emotional exhaustion, not just physical tasks. Clearing a family home isn’t a weekend project. Depending on the home’s size and condition, expect weeks or even months, especially if you’re balancing this with work, caregiving, or your own grief. Build in rest days and permission to step away when memories hit hard. If emotions become overwhelming or you find yourself paralyzed by decision fatigue, pause. Ask a trusted friend to help, or hire a compassionate professional organizer who specializes in downsizing and estate transitions.
Taking these steps upfront protects your health, your family relationships, and the integrity of the estate. It sets you up to clear thoughtfully rather than reactively.
Step-by-Step: The Clearing Process
Do a First Pass and Create Sorting Categories
Before you start sorting individual items, walk through the entire home with a notepad and take stock. Open closets, peek in basements, glance into the attic. This bird’s-eye view helps you understand the real scope (three rooms of furniture versus a packed two-story house) and prevents you from getting blindsided halfway through.
Next, set up your sorting stations in a central room or garage. Grab sturdy boxes or designate clear floor zones, and label each one with a category: Keep, Sell/Consign, Donate, Repurpose/Upcycle, and Trash/Recycle. Keep is for irreplaceable family heirlooms, photo albums, and items loved ones specifically requested. Sell/Consign holds anything with resale value, vintage furniture, collectibles, designer handbags, or antique decor worth photographing for online marketplaces. Donate catches gently used clothing, kitchenware, linens, and everyday household goods that local thrift stores will gladly accept.
The Repurpose/Upcycle box is where your creativity shines. Toss in old crates you could repurpose into shelves worn quilts perfect for pillow covers, or vintage tins that make charming planters. Finally, Trash/Recycle is for broken appliances, expired medications, stained textiles, and anything beyond saving. Label everything clearly with a thick marker so helpers (or future-you, three hours in) know exactly where each item belongs.
Tackle One Room at a Time
Start with a space that won’t knock the wind out of you emotionally. The garage, a guest room, or a linen closet makes a great first target because these areas rarely hold the deeply personal items that slow you down. You’ll build confidence and momentum before facing the bedroom nightstands or photo albums.
Once you pick your room, work in layers. Clear surfaces first, countertops, dressers, shelves. Then open drawers, sorting as you go. Save closets for last since they’re often the most packed. This top-to-bottom approach keeps you from pulling everything out at once and creating an overwhelming mountain of stuff.
I learned this the hard way when clearing my grandmother’s sewing room. I started by dumping every drawer onto the bed, and within ten minutes I was paralyzed by choices. When I regrouped and tackled one cabinet at a time, I actually made progress. That’s also when I stumbled onto her stash of vintage flour-sack fabric, beautiful prints from the 1940s that I later turned into tea towels for a craft fair. Her collection of Pyrex mixing bowls, which I almost tossed in a donation box, sold for genuine money at a consignment shop.
Keep your sorting categories visible and stick to your system. Decision fatigue is real, so giving every item a clear destination helps you keep moving forward.
Identify Items Worth Selling or Donating
Not everything deserves the landfill. Before you donate or toss, spend an hour spotting items that could fund the clearing process or bring joy to someone else’s home.
Start with furniture thrifting wisdom in reverse: look for solid wood pieces (flip them over to check construction), mid-century modern chairs with tapered legs, vintage dressers with dovetail joints, and anything labeled Henredon, Lane, or Drexel. A quick search on your phone reveals market value. That dated sofa nobody wants? Probably trash. The teak credenza gathering dust? Could be a $400 resale gem.
Check closets for designer labels, leather handbags, vintage denim, and unworn shoes. Scan kitchens for Pyrex, Le Creuset, or retro Fiestaware. Peek at wall art, mirrors, lamps, and quirky decor finds that photograph well.
When it’s time to rehome these treasures, photograph items in natural light against a clean background. Take close-ups of labels, hardware, and condition issues. List higher-value pieces on Facebook Marketplace, Craigslist, or Poshmark. Mid-range furniture and decor work well in local consignment shops or weekend estate sales.
For the thrift vs Restoration Hardware crowd hunting quality on a budget, your donations matter. Call Habitat for Humanity ReStore, Goodwill, or Salvation Army to schedule pickups for gently used furniture and housewares. Smaller charities often accept clothing, books, and kitchenware.
Every item you sell or donate is one less thing headed to a dump, money back in your pocket, and a chance for someone else to score exactly what they need. That shift in perspective turns clearing out into giving back.
Handle Sentimental Items with Intention
Sentimental items will slow you down, and that’s okay. This is where the work gets real.
Start by giving yourself a limit, one memory box per family member, or a single shelf’s worth of keepsakes. Physical boundaries help when emotions don’t. Sort photos into piles: must-keep originals, candidates for digitizing, and duplicates you can let go. Scanning services or even a smartphone app can preserve thousands of images without the storage burden.
For clothing that holds memories, a grandmother’s apron, a father’s flannel shirt, consider repurposing rather than storing. I’ve seen old linens framed as wall art, wool coats turned into throw pillows, and cotton dresses transformed into quilts. It honors the person and creates something you’ll actually use.
Letters and cards deserve a quick read-through. Keep the meaningful ones, recycle the rest. You’re not erasing anyone by decluttering their birthday cards from 1987.
Give yourself permission to feel conflicted. Letting go of an object doesn’t mean letting go of the memory. What matters lived in the moments, not the things.

Coordinate Pickups, Sales, and Final Cleanout
Once you’ve sorted everything, it’s time to execute your plan. Call donation centers to schedule pickups, many charities will haul away furniture and boxes at no cost, saving you rental truck fees. If you’re holding an estate sale, book a reputable company several weeks ahead; they’ll handle pricing, staging, and sales while you focus on emotional tasks. For online resale, photograph items in good light, write honest descriptions, and price competitively to move things quickly.
Hire junk removal for the final load, broken furniture, expired items, and anything unsalvageable. Before closing the door for the last time, do a deep clean. Wipe down surfaces, vacuum thoroughly, and remove hard water stains from sinks and tubs if you’re selling the property. Walk through each room one last time, checking closets, drawers, and forgotten corners. This final sweep ensures you haven’t missed a cherished photo tucked in a book or jewelry box pushed to the back of a shelf, and it gives you a moment to say goodbye to the space itself.
How to Know You’re Done (and What Comes Next)
You’ll know the job is finished when both the checklist and your gut tell you it’s time. Walk through each room one last time, every closet open, every drawer pulled. The home should match whatever goal you set at the start: completely empty if you’re selling, thoughtfully staged with essential furniture if a new occupant is moving in, or cleared to the level the family agreed on. All boxes should be labeled and stored or distributed, donations scheduled or dropped off, estate sale proceeds settled, and anything destined for resale listed or consigned.
Check the practical loose ends too. Utilities need to be canceled or transferred, mail forwarded, locks changed if necessary. If you’re settling an estate, confirm that legal and financial tasks are wrapped up, titles transferred, accounts closed, final bills paid. This isn’t glamorous work, but ticking off these details prevents headaches later.
The emotional finish line looks different for everyone. Some families hold a quiet final walkthrough together, sharing stories about the room where holidays happened or the closet that always smelled like lavender. Others take a single meaningful item, a piece of vintage dishware, a framed photo, a quilt, as a tangible reminder before closing the door for the last time. There’s no wrong way to say goodbye.
What comes next depends on your situation. If you’re selling, it’s time to list the property or hand over the keys to the realtor. If a family member is moving in, schedule the handoff and make sure they have what they need. If the home was part of an estate, finalize paperwork with the attorney and distribute proceeds or heirlooms as planned.
Give yourself permission to feel relieved, sad, or both. Clearing a family home after health changes is never just logistics, it’s a threshold. You’ve honored the space, the person, and the memories. That matters more than doing it perfectly.
Common Questions About Clearing a Family Home
Clearing a family home raises dozens of questions, especially when you’re navigating health changes and tight timelines. Here are the answers to the concerns we hear most often.
How long does clearing a family home usually take?
A typical single-family home takes anywhere from one weekend to several weeks, depending on the home’s size, how much stuff needs sorting, and how many hands are helping. If you’re working solo or dealing with decades of accumulation, plan for the longer end of that range.
What if family members can’t agree on what to keep?
Set a deadline for everyone to review sentimental items and speak up, then designate one person as the final decision-maker to keep things moving. Creating a shared photo album of disputed items lets everyone vote or claim what matters to them without endless back-and-forth.
Can I realistically do this alone?
You can, but it’s harder and slower than you think. Even one trusted friend for a weekend makes a huge difference, and hiring help for heavy lifting or final cleanout is worth every penny when you’re already emotionally drained.
How do I handle unwanted furniture that’s too good to trash?
Post it free on Craigslist, Facebook Marketplace, or Freecycle if you want it gone fast, or contact local charities like Habitat for Humanity ReStores or Goodwill for pickup. Estate sale companies will also sell larger pieces on consignment if you’d rather get some money back.
Finding reputable estate sale companies comes down to asking for referrals from friends, checking reviews on Google and Yelp, and interviewing at least two companies before committing. Ask about their commission rates (typically 30-40%), how they price items, and what they do with unsold goods. The best ones have a proven track record and won’t pressure you to accept lowball offers.
Should you sell items yourself or hire someone? If you have the time, energy, and a knack for photographing and listing things online, selling high-value pieces yourself keeps more money in your pocket. But if you’re already stretched thin, an estate sale company or consignment shop handles everything while you focus on the emotional work. There’s no shame in outsourcing the sales logistics when your plate is full.
Donation charities vary wildly in what they accept and whether they offer pickup. The Salvation Army, Vietnam Veterans of America, and local thrift stores often schedule free pickups for furniture and household goods, while smaller charities may have restrictions. Call ahead with a quick inventory so you’re not surprised on pickup day.
Clearing a family home after health changes isn’t a task anyone plans for, and honestly, it doesn’t come with a perfect playbook. You’ll have moments where you’re overwhelmed, days where sorting through your loved one’s belongings feels impossible, and times when you question whether you’re doing any of it “right.” Here’s the truth: there’s no single right way. What matters is that you’re approaching it thoughtfully, at your own pace, with compassion for yourself and respect for the memories you’re handling.
The thrifting mindset we’ve talked about throughout this guide isn’t just about being eco-conscious or budget-savvy. It’s about finding purpose in the process. When you donate that vintage armchair to someone who’ll treasure it, repurpose old linens into something new, or sell collectibles to buyers who genuinely want them, you’re giving those items a second chapter. You’re honoring the life that filled that home while making space for what comes next.
You don’t need to clear everything in a weekend. You don’t need to save every single memento or feel guilty about letting things go. Take breaks when you need them. Ask for help. Keep what truly matters to you, and release the rest with gratitude.
When you’re ready, start with just one drawer, one closet, one manageable corner. That’s enough. The rest will follow.